Containerization-and-DevOps
Experiment 4: Docker Essentials
Dockerfile .dockerignore tagging publishing
Part 1: Containerizing Applications with Dockerfile
Step 1: Create a Simple Application
Python Flask App:
mkdir my-flask-app
cd my-flask-app
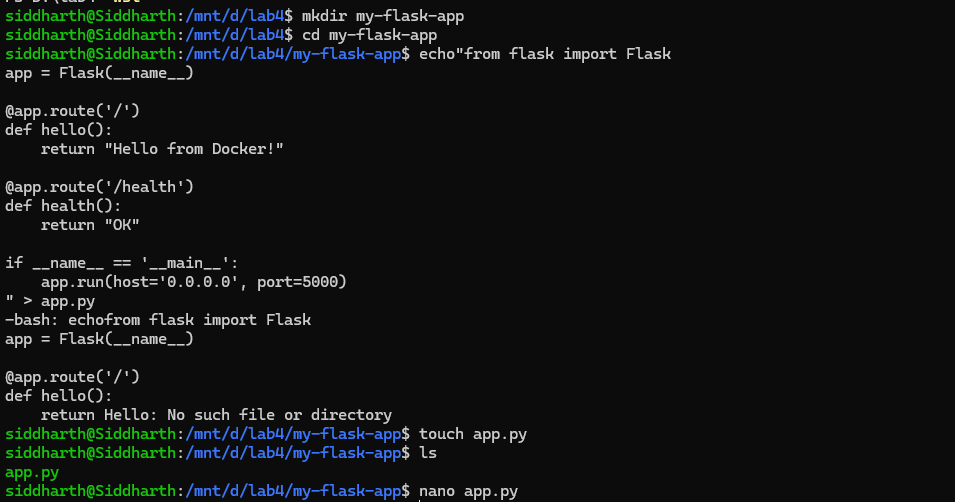
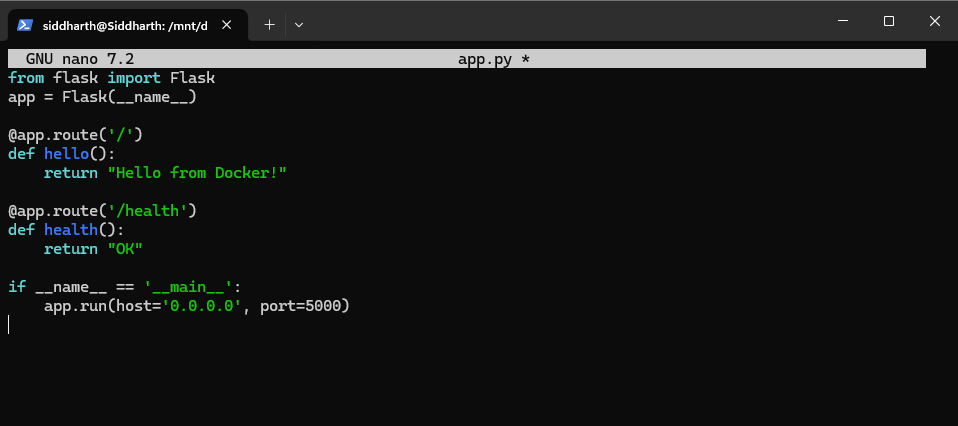
app.py:
from flask import Flask
app = Flask(__name__)

@app.route('/')
def hello():
    return "Hello from Docker!"

@app.route('/health')
def health():
    return "OK"

if __name__ == '__main__':
    app.run(host='0.0.0.0', port=5000)
requirements.txt:
Flask==2.3.3


Step 2: Create Dockerfile

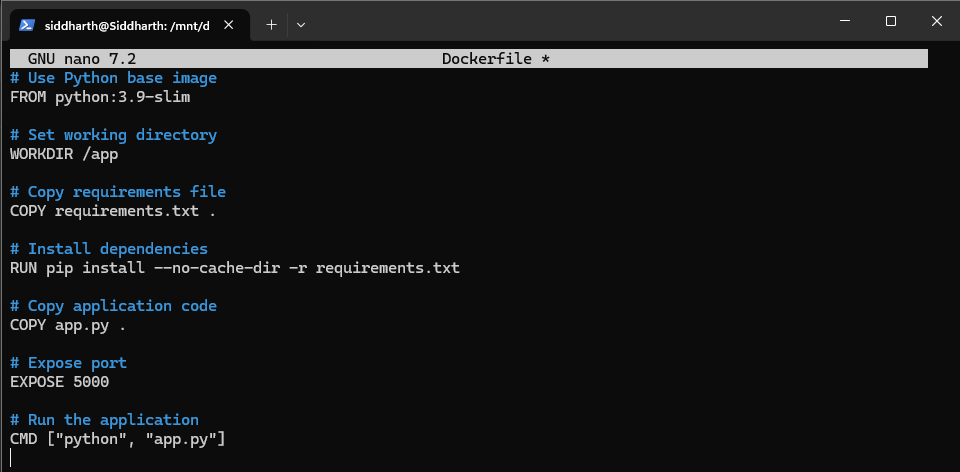
Dockerfile:
# Use Python base image
FROM python:3.9-slim

# Set working directory
WORKDIR /app

# Copy requirements file
COPY requirements.txt .

# Install dependencies
RUN pip install --no-cache-dir -r requirements.txt

# Copy application code
COPY app.py .

# Expose port
EXPOSE 5000

# Run the application
CMD ["python", "app.py"]
Part 2: Using .dockerignore
Step 1: Create .dockerignore File

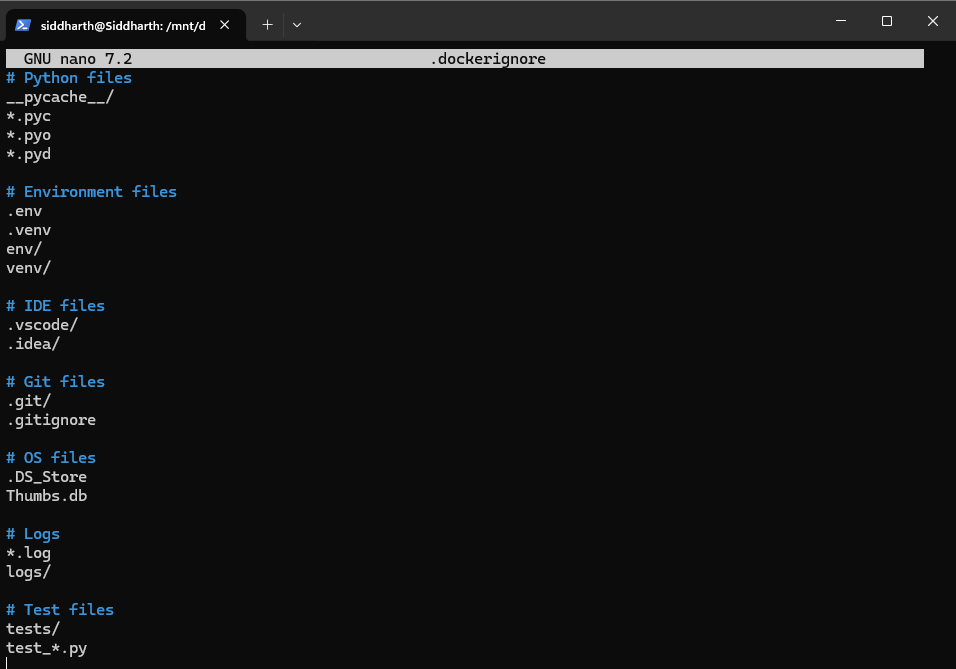
.dockerignore:
# Python files
__pycache__/
*.pyc
*.pyo
*.pyd

# Environment files
.env
.venv
env/
venv/

# IDE files
.vscode/
.idea/

# Git files
.git/
.gitignore

# OS files
.DS_Store
Thumbs.db

# Logs
*.log
logs/

# Test files
tests/
test_*.py
Step 2: Why .dockerignore is Important
- Prevents unnecessary files from being copied
- Reduces image size
- Improves build speed
- Increases security
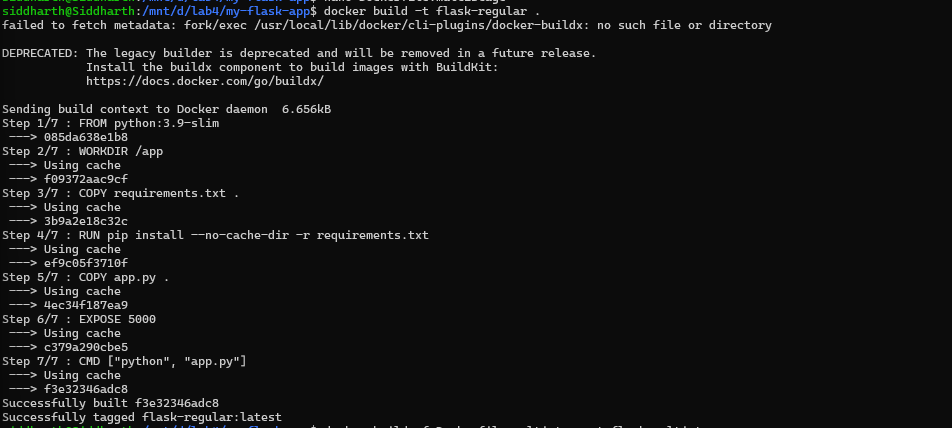
Part 3: Building Docker Images
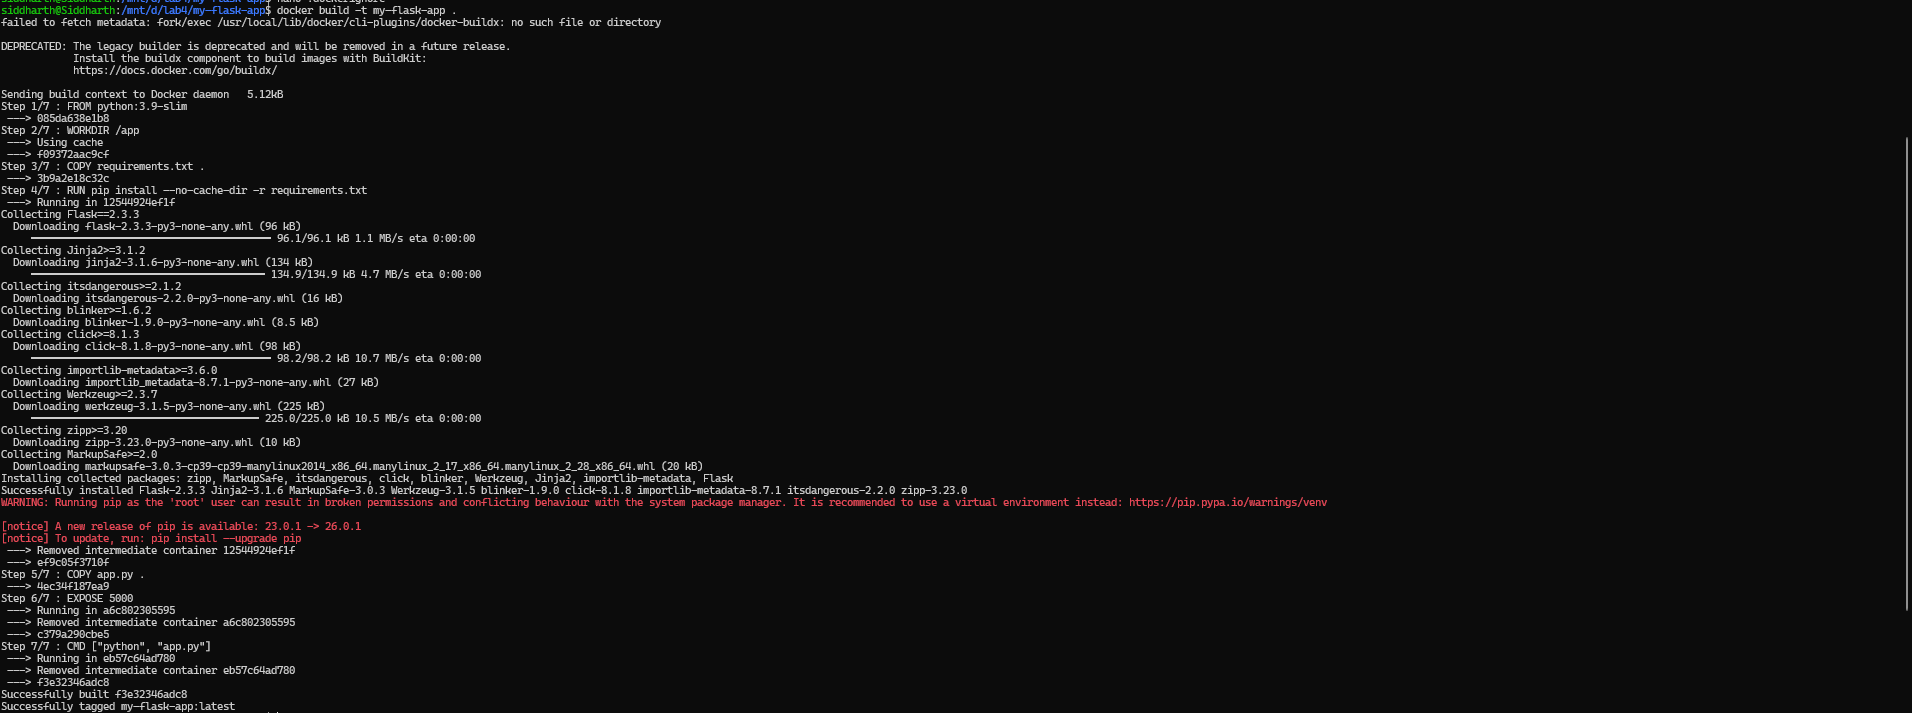
Step 1: Basic Build Command
# Build image from Dockerfile
docker build -t my-flask-app .
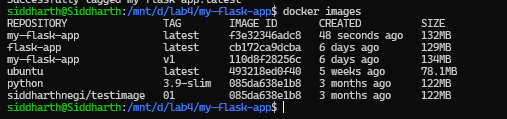
# Check built images
docker images
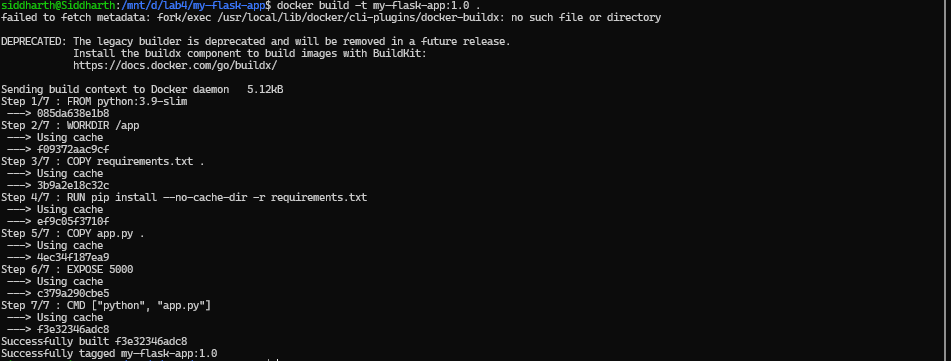
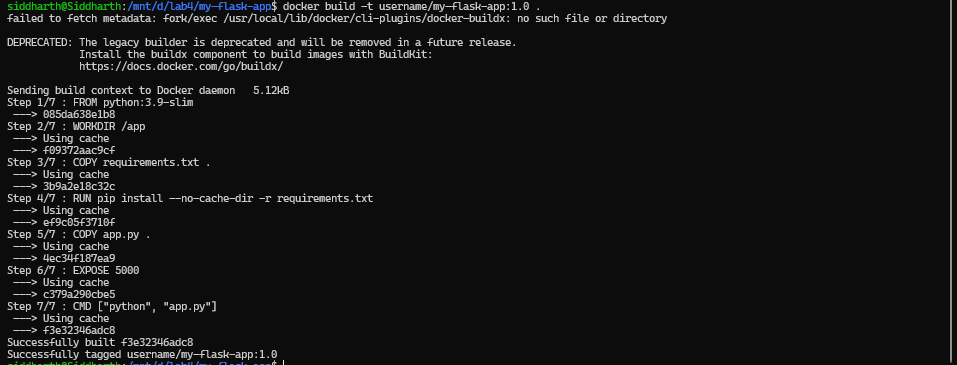
Step 2: Tagging Images
# Tag with version number
docker build -t my-flask-app:1.0 .
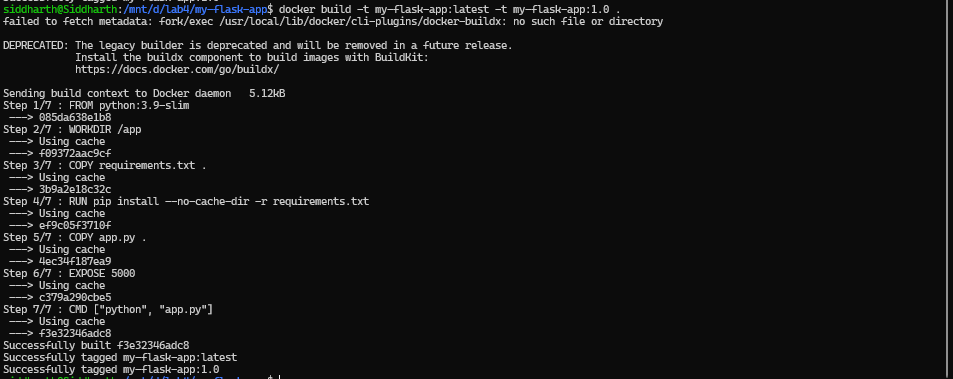
# Tag with multiple tags
docker build -t my-flask-app:latest -t my-flask-app:1.0 .
# Tag with custom registry
docker build -t username/my-flask-app:1.0 .
# Tag existing image
docker tag my-flask-app:latest my-flask-app:v1.0
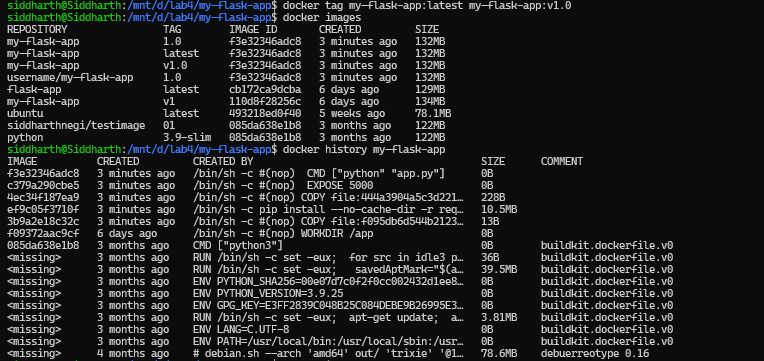
Step 3: View Image Details
# List all images
docker images
# Show image history
docker history my-flask-app
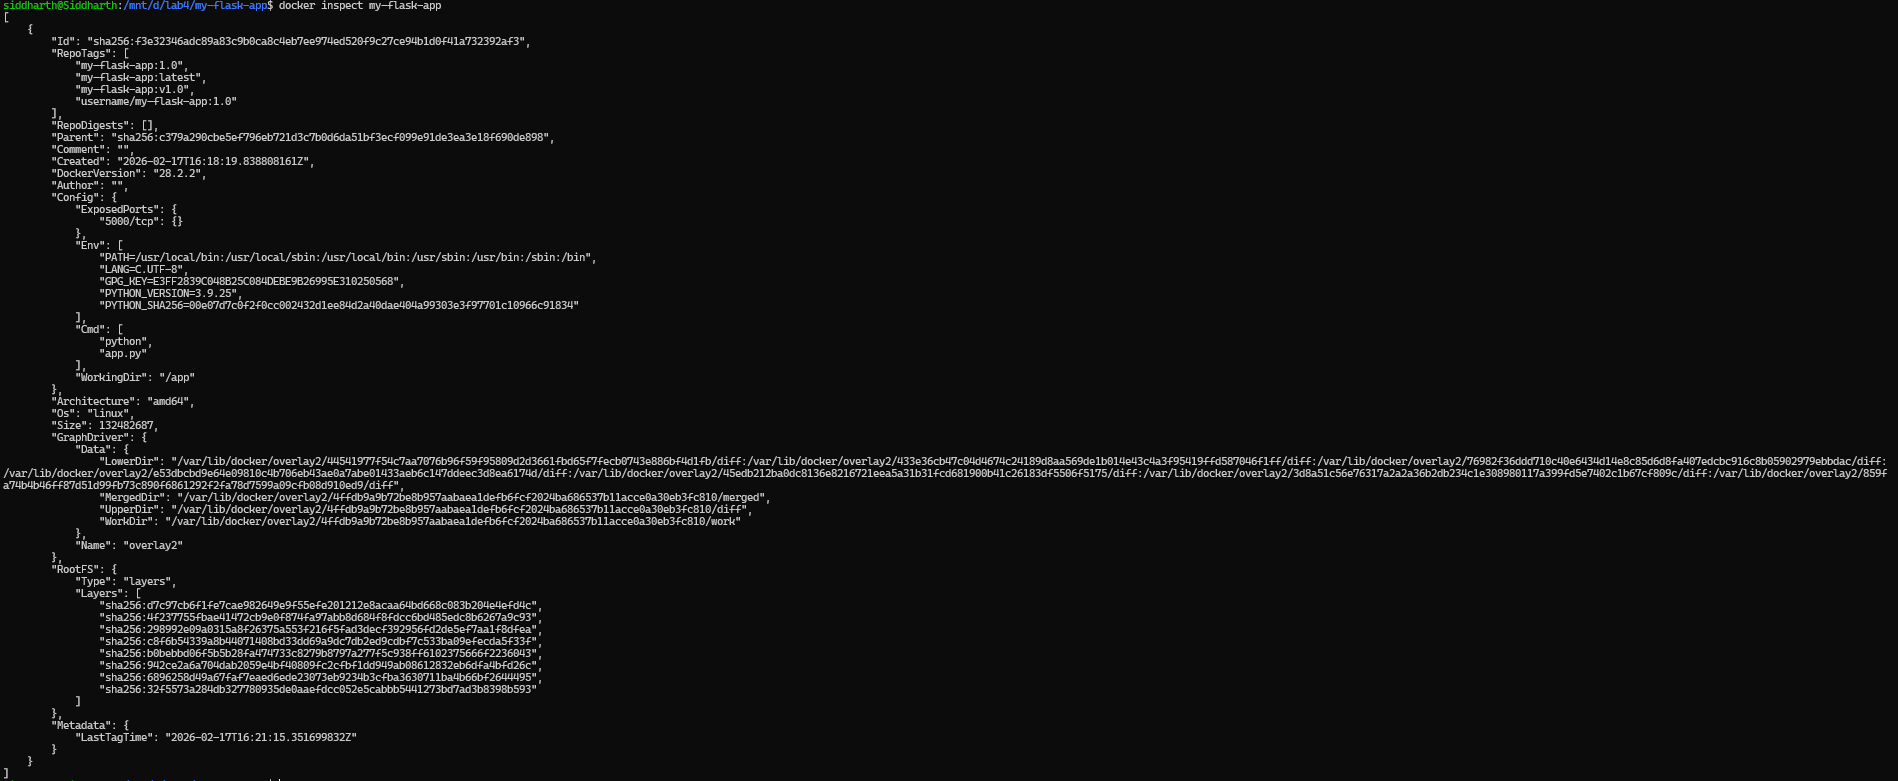
# Inspect image details
docker inspect my-flask-app
Part 4: Running Containers
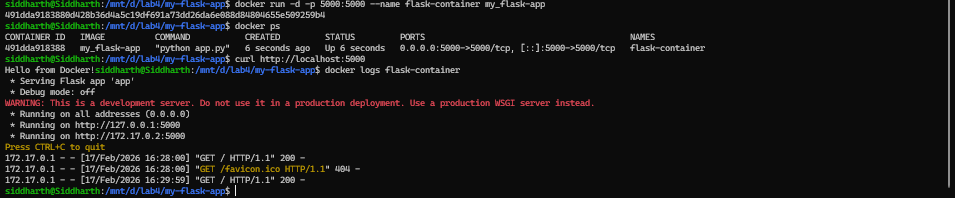
Step 1: Run Container
# Run container with port mapping
docker run -d -p 5000:5000 --name flask-container my-flask-app

# Test the application
curl http://localhost:5000

# View running containers
docker ps

# View container logs
docker logs flask-container

Step 2: Manage Containers
# Stop container
docker stop flask-container

# Start stopped container
docker start flask-container

# Remove container
docker rm flask-container

# Remove container forcefully
docker rm -f flask-container

Explanation
docker rm flask-container
The docker rm command is used to remove (delete) a container. However, Docker does not allow removal of a container that is currently in the running state. A container must first be stopped before it can be removed.
This design ensures:
- Running processes are not abruptly terminated
- Active services are not accidentally deleted
- Data integrity is maintained

The container is permanently deleted from Docker. If we attempt to remove it again using:
docker rm -f flask-container
Docker returns:
Error response from daemon: No such container: flask-container
This happens because the container has already been removed and no longer exists in the Docker engine. Hence, this is not an actual error but expected behavior.
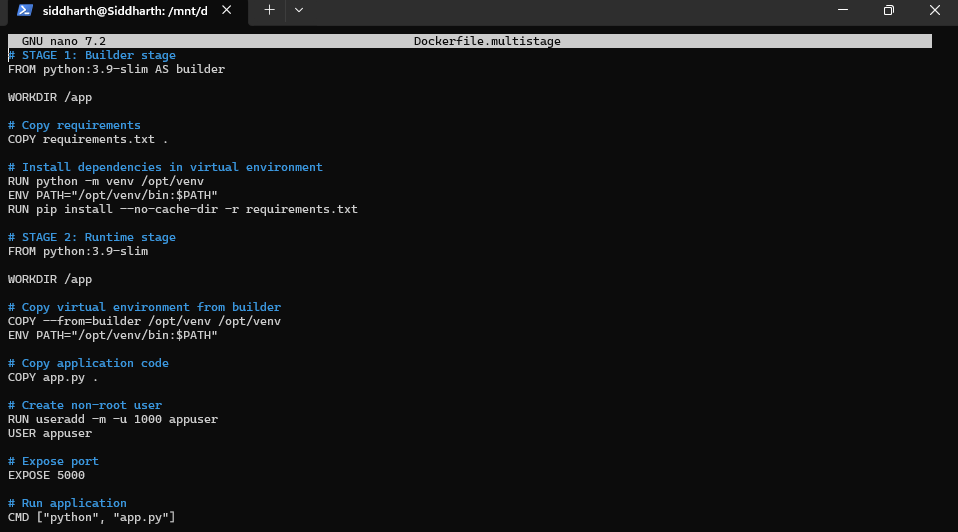
Part 5: Multi-stage Builds
Step 1: Why Multi-stage Builds?
- Smaller final image size
- Better security (remove build tools)
- Separate build and runtime environments
Step 2: Simple Multi-stage Dockerfile

Dockerfile.multistage:
# STAGE 1: Builder stage
FROM python:3.9-slim AS builder

WORKDIR /app

# Copy requirements
COPY requirements.txt .

# Install dependencies in virtual environment
RUN python -m venv /opt/venv
ENV PATH="/opt/venv/bin:$PATH"
RUN pip install --no-cache-dir -r requirements.txt

# STAGE 2: Runtime stage
FROM python:3.9-slim

WORKDIR /app

# Copy virtual environment from builder
COPY --from=builder /opt/venv /opt/venv
ENV PATH="/opt/venv/bin:$PATH"

# Copy application code
COPY app.py .

# Create non-root user
RUN useradd -m -u 1000 appuser
USER appuser

# Expose port
EXPOSE 5000

# Run application
CMD ["python", "app.py"]
Step 3: Build and Compare
# Build regular image
docker build -t flask-regular .
# Build multi-stage image
docker build -f Dockerfile.multistage -t flask-multistage .
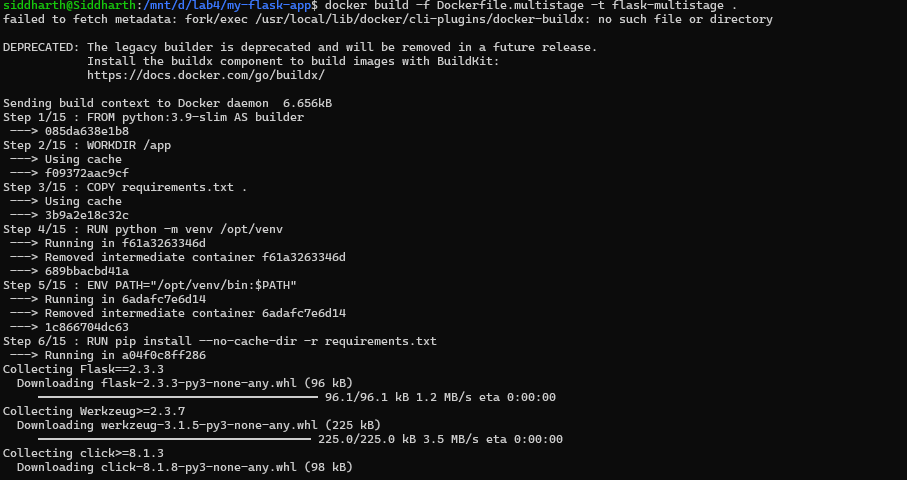
# Compare sizes
docker images | grep flask-

# Expected output:
# flask-regular     ~250MB
# flask-multistage  ~150MB (40% smaller!)

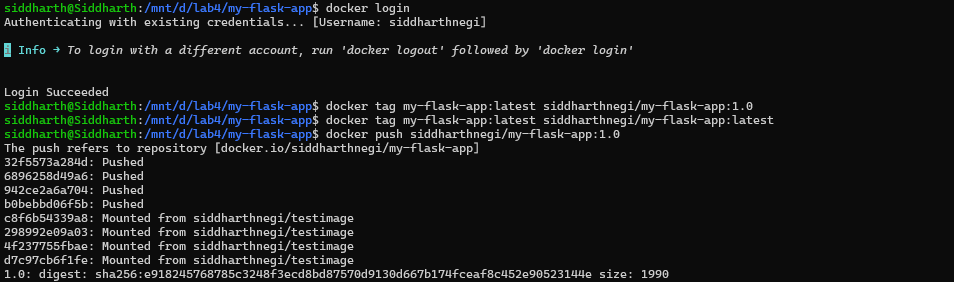
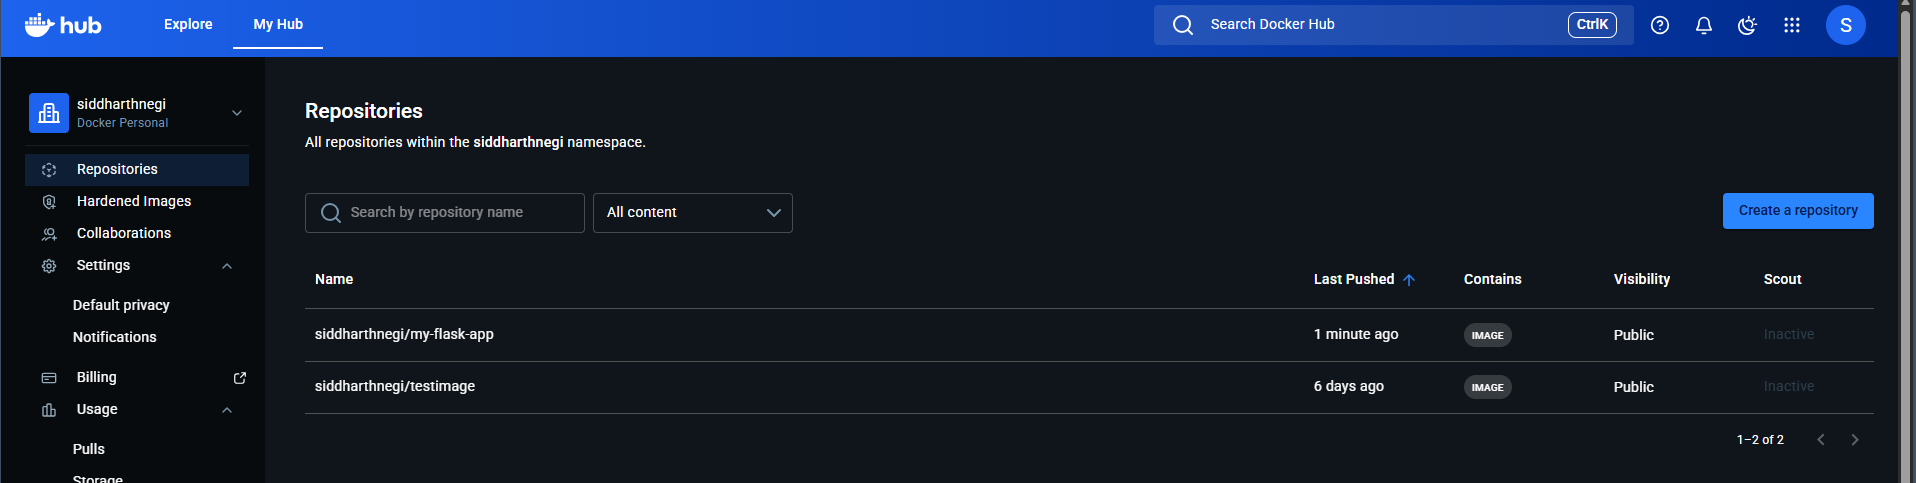
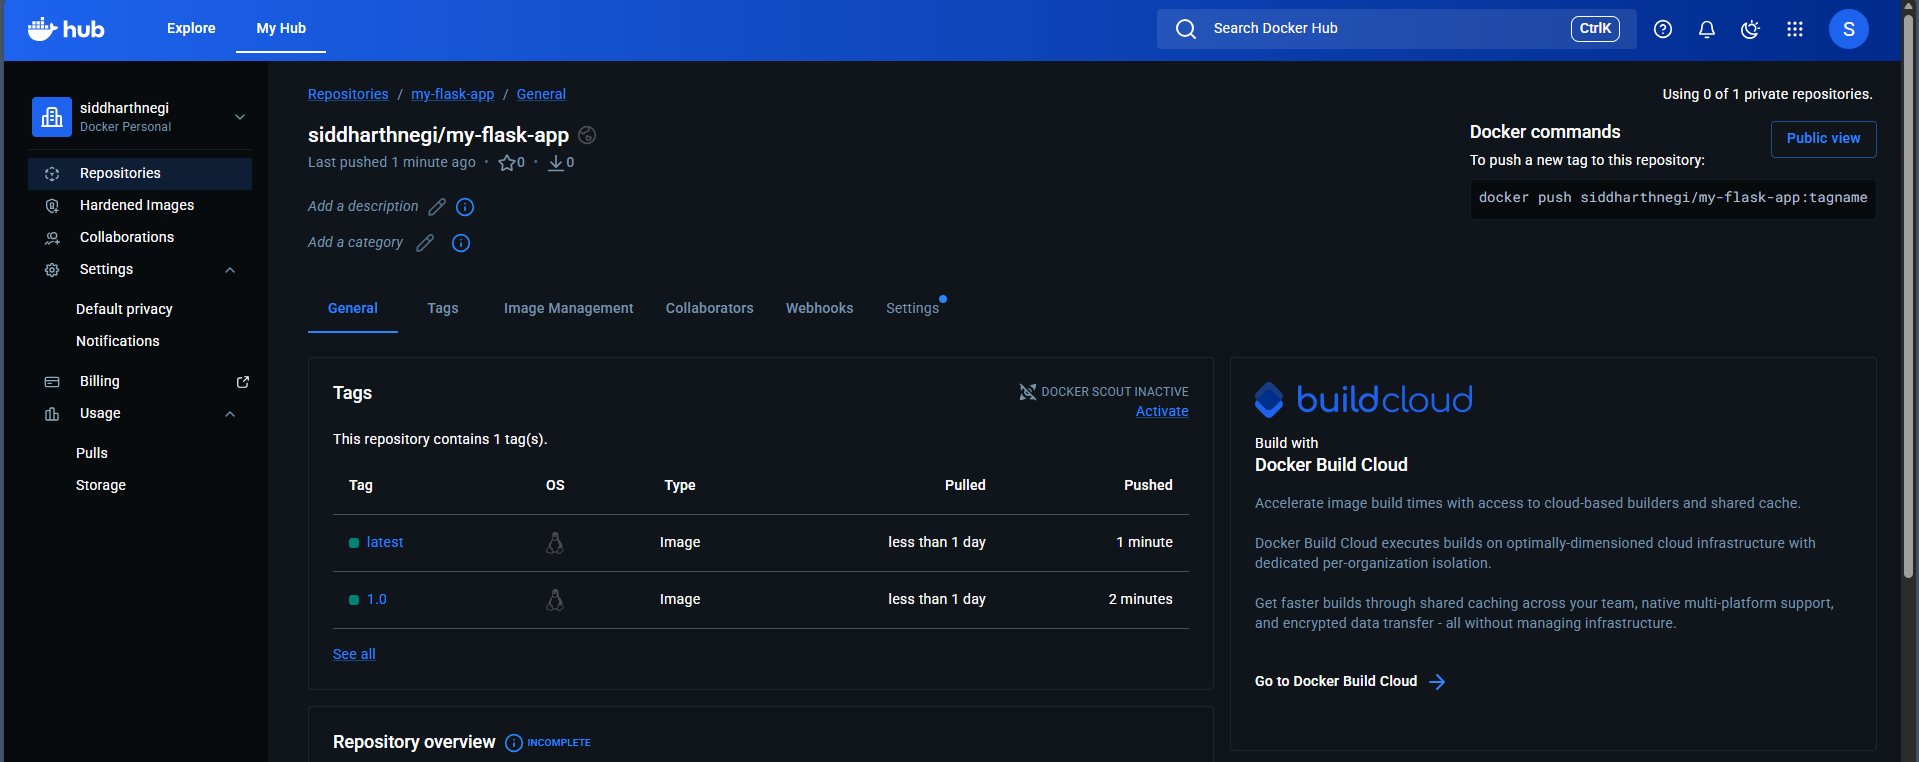
Part 6: Publishing to Docker Hub
Step 1: Prepare for Publishing
# Login to Docker Hub
docker login

# Tag image for Docker Hub
docker tag my-flask-app:latest username/my-flask-app:1.0
docker tag my-flask-app:latest username/my-flask-app:latest

# Push to Docker Hub
docker push username/my-flask-app:1.0
docker push username/my-flask-app:latest

Step 2: Pull and Run from Docker Hub
# Pull from Docker Hub (on another machine)
docker pull username/my-flask-app:latest

# Run the pulled image
docker run -d -p 5000:5000 username/my-flask-app:latest

Common Workflow Summary
Development Workflow
1. Create Dockerfile and .dockerignore
# 2. Build image
docker build -t myapp .

# 3. Test locally
docker run -p 8080:8080 myapp

# 4. Tag for production
docker tag myapp:latest myapp:v1.0

# 5. Push to registry
docker push myapp:v1.0
Production Workflow

# 1. Pull from registry
docker pull myapp:v1.0

# 2. Run in production
docker run -d -p 80:8080 --name prod-app myapp:v1.0

# 3. Monitor
docker logs -f prod-app
Key Takeaways
- Dockerfile defines how to build an image.
- .dockerignore excludes unnecessary files.
- Tagging helps version control images.
- Multi-stage builds create smaller images.
- Docker Hub allows sharing images.
- Always test locally before publishing.
Cleanup
Code :
docker container prune
docker image prune
docker system prune -a